


fommes
-
Posts
6,385 -
Joined
-
Last visited
Recent Profile Visitors
24,445 profile views


-
 fommes reacted to a post in a topic:
New CD recording of John Williams Flute Concerto by Singapore Symphony Orchestra
fommes reacted to a post in a topic:
New CD recording of John Williams Flute Concerto by Singapore Symphony Orchestra
-
fommes reacted to a post in a topic:
2026 FOR YOUR CONSIDERATION studio sites (featuring music)
-
Arnaud2 reacted to a post in a topic:
John Williams arr 'Tribute to film composers' without audience?
-

John Williams arr 'Tribute to film composers' without audience?
fommes replied to Luke Skywalker's topic in JOHN WILLIAMS
Should you need another incentive to buy this album, it also contains the 2013 concert arrangement of "The Face of Pan": https://shop.filmfestival.be/products/world-soundtrack-awards-tribute-to-the-film-composer -
fommes reacted to a post in a topic:
John Williams arr 'Tribute to film composers' without audience?
-
So will this have dialogue/sfx from those scenes as well?
-
 fommes reacted to a post in a topic:
John Williams: A Composer's Life - SPOILERS ALLOWED discussion thread
fommes reacted to a post in a topic:
John Williams: A Composer's Life - SPOILERS ALLOWED discussion thread
-
fommes reacted to a post in a topic:
The official Alexandre Desplat thread
-
Composer Threads The official Alexandre Desplat thread
fommes replied to David Coscina's topic in General Discussion
Suitably, they performed Girl with a Pearl Earring in Rotterdam (as an encore), but The Ghostwriter was dropped, and the suite from Syriana/Argo was missing from the main programme. -
Composer Threads The official Alexandre Desplat thread
fommes replied to David Coscina's topic in General Discussion
Also to Rotterdam tonight and tomorrow. -
fommes reacted to a post in a topic:
The John Williams Piano Collection
-
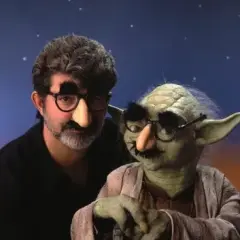
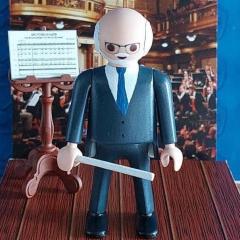
fommes reacted to a post in a topic:
John Williams in LEGO
-
One other element that I feel the last seasons lacked was Rob Bowman as director.
-
fommes reacted to a post in a topic:
new discovery - original Cantina Band cue title
-
 fommes reacted to a post in a topic:
2025 IFMCA Awards
fommes reacted to a post in a topic:
2025 IFMCA Awards
-
fommes reacted to a post in a topic:
2025 IFMCA Awards
-
Jay reacted to a post in a topic:
Ira Newborn - The Naked Gun Trilogy (3CD set from La-La Land July 15)
-
Dr. Know reacted to a post in a topic:
Christopher Gunning YORKSHIRE GLORY: A SYMPHONIC PORTRAIT (1991)
-
Naïve Old Fart reacted to a post in a topic:
Christopher Gunning YORKSHIRE GLORY: A SYMPHONIC PORTRAIT (1991)
-
Christopher Gunning YORKSHIRE GLORY: A SYMPHONIC PORTRAIT (1991)
fommes replied to Dr. Know's topic in General Discussion
Indeed, excellent score, and it's been too long since I've played the CD, although I recently revisited his Poirot scores. Thank you for reminding me of this. -
David Arnold's DIE ANOTHER DAY (2002) - 2017 2-CD La-La Land Edition
fommes replied to Jay's topic in General Discussion
Yes, that was meant for the end credits I believe. -
Quppa reacted to a post in a topic:
The official Alexandre Desplat thread
-
hp_gof reacted to a post in a topic:
The official Alexandre Desplat thread
-
Composer Threads The official Alexandre Desplat thread
fommes replied to David Coscina's topic in General Discussion
Both The Ghost Writer and Birth will have been encores. I'm certain about the former, I can't quite remember the latter for sure. -
Alexandre Desplat - Jurassic World Rebirth (2025)
fommes replied to Toillion's topic in General Discussion
Will the Mondo 2CD also become available at Amazon and other retailers (worldwide), or do these Mondo releases stay exclusive? -
Very sad news. Rest in peace.
-
Jerry Goldsmith's THE CHAIRMAN (1969) - 2025 Intrada Kickstarter
fommes replied to Jay's topic in General Discussion
As with all of the Intrada kickstarters over the past few years, this one just doesn't have great appeal to people outside of the US (on a budget) anymore, I feel, due to the shipping and customs issues that Marian mentioned. I might consider if there would be free international shipping (to counterbalance the customs and additional postal charges), if the 'thank you' price wasn't that steep, or with any other interesting perks that are reasonable. I'll buy the CD if this project makes it, and I hope it does because it's a great score, and I'd really like to hear new recordings of those unreleased cues too. -
Once reacted to a post in a topic:
Streisand sings Williams
-
Stéphane Denève conducts John Williams in Berlin, June 5-7 2025
fommes replied to Jay's topic in JOHN WILLIAMS
How did you do that? I don't see any account registration on their concert/calendar website. -
 Once reacted to a post in a topic:
The Patriot (Intrada) 3CD Set
Once reacted to a post in a topic:
The Patriot (Intrada) 3CD Set
-
This is the demo that was released on a promo.
-
Quppa reacted to a post in a topic:
The Patriot (Intrada) 3CD Set
-
ragoz350 reacted to a post in a topic:
The Patriot (Intrada) 3CD Set
-
The demo was also released as "Watching the Wheat". https://www.musicmeter.nl/album/165654
-
Presumably it's an "adaptation" because this was done on synth?